Discover the ancient art of clay pit cooking, where flames, earth, and raw ingredients unite to create unforgettably smoky, tender dishes without modern conveniences.
🔥 Reconnecting with Our Ancestral Cooking Roots
Long before stainless steel pots and electric ovens dominated our kitchens, our ancestors mastered the art of transforming raw ingredients into nourishing meals using nothing but earth, fire, and ingenuity. Clay pit cooking represents one of humanity’s oldest culinary techniques, practiced across continents from the Polynesian islands to Native American settlements, from African villages to ancient Mediterranean civilizations.
This primitive cooking method isn’t just a historical curiosity—it’s a gateway to flavors that modern cooking equipment simply cannot replicate. The slow, even heat distribution, the subtle earthiness imparted by clay, and the aromatic smoke from hardwood create a symphony of tastes that awakens something primal in our palates.
Today’s revival of clay pit cooking speaks to our collective desire to disconnect from technology and reconnect with elemental cooking processes. Whether you’re a bushcraft enthusiast, a culinary adventurer, or simply someone seeking more authentic food experiences, mastering this ancient technique opens up a world of possibilities.
Understanding the Clay Pit Cooking Foundation
Clay pit cooking operates on principles of indirect heat, moisture retention, and slow temperature regulation. Unlike direct grilling or roasting over open flames, this method creates an underground oven where food cooks through radiant heat stored in heated stones and surrounding earth.
The process involves digging a pit, lining it with stones, building a substantial fire to heat those stones, then burying food wrapped in protective layers among the hot rocks. As the fire burns down and the pit is covered, the stored thermal energy slowly cooks the food over several hours, creating incredibly tender results with deep, complex flavors.
The Science Behind the Smoke and Steam
What makes clay pit cooking so effective? The answer lies in thermodynamics and moisture management. When properly constructed, your pit becomes a sealed cooking chamber where temperatures stabilize between 250-350°F (120-175°C)—the ideal range for breaking down tough proteins and developing rich flavors.
The moisture from the food itself, combined with added water sources like soaked leaves or damp earth, creates a steam environment. This prevents drying while allowing smoke particles to penetrate the food, infusing it with aromatic compounds that define authentic pit-cooked cuisine.
🌍 Selecting the Perfect Location for Your Cooking Pit
Your pit’s location dramatically impacts cooking success and safety. Choose ground with good drainage—avoid areas where water naturally collects. Sandy or loamy soil works better than dense clay for digging, though ironically, clay-rich soil provides excellent heat retention once your pit is established.
Consider wind patterns when positioning your pit. Prevailing breezes should help carry smoke away from gathering areas while providing sufficient oxygen during the initial burning phase. Ensure at least fifteen feet of clearance from structures, overhanging branches, or dry vegetation.
Legal and environmental considerations matter too. Check local regulations regarding open fires and ground disturbance. Practice Leave No Trace principles if cooking in wilderness areas—some pristine locations prohibit pit digging entirely to preserve natural landscapes.
Constructing Your Clay Pit Without Modern Tools
Building an authentic clay pit using only primitive implements challenges our tool-dependent mindset while connecting us to ancestral problem-solving. Your essential toolkit consists of sharpened sticks for digging, flat stones for scooping, and hardwood branches for leverage.
The Step-by-Step Pit Construction Process
Begin by outlining your pit dimensions—typically 3-4 feet in diameter and 2-3 feet deep for cooking substantial quantities. Use a pointed hardwood stick to break up soil, working in concentric circles from the center outward. This technique, though labor-intensive, effectively loosens earth without metal shovels.
As you dig deeper, use flat stones or bark pieces to scoop loosened soil from the pit. Save the excavated earth nearby—you’ll need it later to cover and seal your cooking chamber. Shape the pit walls to slope slightly inward, creating stability and focusing heat toward the center.
Once your pit reaches the desired depth, smooth the bottom surface and create a slight depression in the center. This catches any drippings and ensures even stone distribution during the cooking process.
Gathering and Preparing the Right Stones
Stone selection represents perhaps the most critical aspect of successful clay pit cooking. The wrong rocks can literally explode when heated, sending dangerous shrapnel flying. Never use river rocks, porous stones, or rocks with visible moisture—these contain trapped water that expands violently when heated.
Ideal cooking stones include granite, basalt, and other dense, non-porous volcanic rocks. Look for stones about fist-sized to melon-sized—large enough to retain heat but small enough to arrange effectively. You’ll need approximately 50-80 stones for a medium-sized pit, depending on their size and your cooking load.
Testing Stone Safety Before Use
Before committing stones to your cooking pit, conduct safety tests. Tap stones together—dense cooking stones produce a clear, ringing sound rather than a dull thud. Examine surfaces for cracks, layers, or crystalline structures that might indicate instability under heat.
For ultimate safety, test-fire suspicious stones individually. Heat them gradually in a small fire for thirty minutes. Problem stones typically reveal themselves by cracking or exploding during this preliminary heating. This extra step prevents dangerous surprises during actual cooking sessions.
🔥 Mastering Fire Building Without Matches or Lighters
True primitive cooking demands fire creation using friction-based methods or natural materials. While mastering bow drill or hand drill techniques requires practice, the satisfaction of igniting flames through your own effort enhances the entire cooking experience.
For those new to primitive fire starting, the bow drill method offers the most reliable results. You’ll need a spindle of straight hardwood, a fireboard of softer wood like cedar or cottonwood, a curved branch for the bow, cordage made from plant fibers or rawhide, and a handhold stone.
Alternative Ignition Methods
The fire plow technique works well in tropical or subtropical environments where bamboo is available. This method involves rapidly pushing a hardwood stick along a groove carved in a softer wood base, generating friction dust that eventually ignites.
Flint and steel (using iron pyrite as a natural alternative) produces sparks that catch in char cloth or fungus tinder. While technically involving a metal tool, natural iron deposits allow for a semi-primitive approach that our ancestors utilized for millennia.
Building the Perfect Cooking Fire
Your pit fire serves dual purposes: heating stones to optimal temperature and burning down to leave minimal ash. Start with a substantial tinder bundle of dry grass, shredded bark, or plant down. Build a teepee structure of pencil-thin kindling around your tinder, leaving space for oxygen flow.
Once kindling ignites, gradually add finger-thick fuel, then wrist-thick hardwood pieces. Oak, hickory, mesquite, and fruitwoods like apple or cherry provide excellent heat while imparting subtle flavors to your food. Avoid softwoods like pine—they contain resins that create acrid smoke and excessive soot.
Arrange your cooking stones directly in and around the fire as it builds. This ensures even heating across all stones. Let the fire burn vigorously for 2-3 hours, maintaining temperatures hot enough that stones glow faintly in diminishing daylight—this indicates proper thermal loading.
🥘 Preparing Food Using Only Natural Materials
Without aluminum foil, cooking bags, or metal utensils, food preparation requires creativity and knowledge of natural wrapping materials. Large, non-toxic leaves serve as primary food wrappers—banana leaves, grape leaves, corn husks, and large edible plant leaves all work beautifully.
Soak leaves thoroughly before use to prevent burning and increase steam generation. Layer multiple leaves to create sufficient thickness for protection. For foods requiring direct stone contact, create a barrier using clean, damp clay formed into flat cakes.
Seasoning Without Processed Ingredients
Authentic primitive cooking embraces wild and foraged seasonings. Crush wild garlic, onion grass, or ramps between stones for aromatic bases. Grind dried berries, seeds, or bark for complex flavor additions. Create salt by evaporating seawater or harvesting mineral-rich deposits near salt springs.
Fresh herbs tied in bundles and placed directly on hot stones release aromatic oils that permeate cooking chambers. Sage, thyme, rosemary, and bay leaves withstand pit cooking temperatures while contributing distinctive flavors. Experiment with regional wild herbs to create truly local flavor profiles.
The Art of Layering and Burying Your Feast
Once your stones glow with stored heat and fire burns down to minimal flames, the layering process begins. Working quickly to preserve heat, use long sticks to spread hot stones evenly across the pit bottom, creating a uniform heat base.
Add a layer of damp leaves or grass over the stones—this creates protective cushioning and generates initial steam. Place your largest, densest items (roots, whole poultry, large fish) directly on this layer, spacing them to allow heat circulation.
Strategic Food Placement for Even Cooking
Position foods requiring longest cooking times closest to the heat source at pit bottom. Layer vegetables and smaller items in the middle zone. Delicate items like fish fillets or tender greens go in upper layers where temperatures are gentler.
Between each food layer, add more dampened leaves and additional hot stones if available. This creates multiple heat zones and maintains moisture throughout the cooking chamber. The layering strategy transforms your pit into a sophisticated multi-zone oven despite its primitive construction.
⏰ Sealing, Timing, and the Waiting Game
After completing food placement, add a thick layer of large leaves or grass as a final protective barrier. Cover everything with the excavated soil, creating a dome-shaped mound that seals in heat and smoke. Pat the earth firmly to eliminate air gaps while leaving the mound slightly loose to prevent excessive pressure buildup.
Mark your pit location clearly—after several hours, the surface may blend with surrounding ground. Some traditions use a central stick that penetrates the layers, serving as both marker and steam vent. Others prefer complete sealing for maximum smoke penetration.
Determining Optimal Cooking Times
Cooking duration varies based on food types, quantities, and pit temperature. Use these general guidelines for timing:
- Root vegetables (potatoes, carrots, beets): 3-4 hours
- Whole chickens or ducks: 4-5 hours
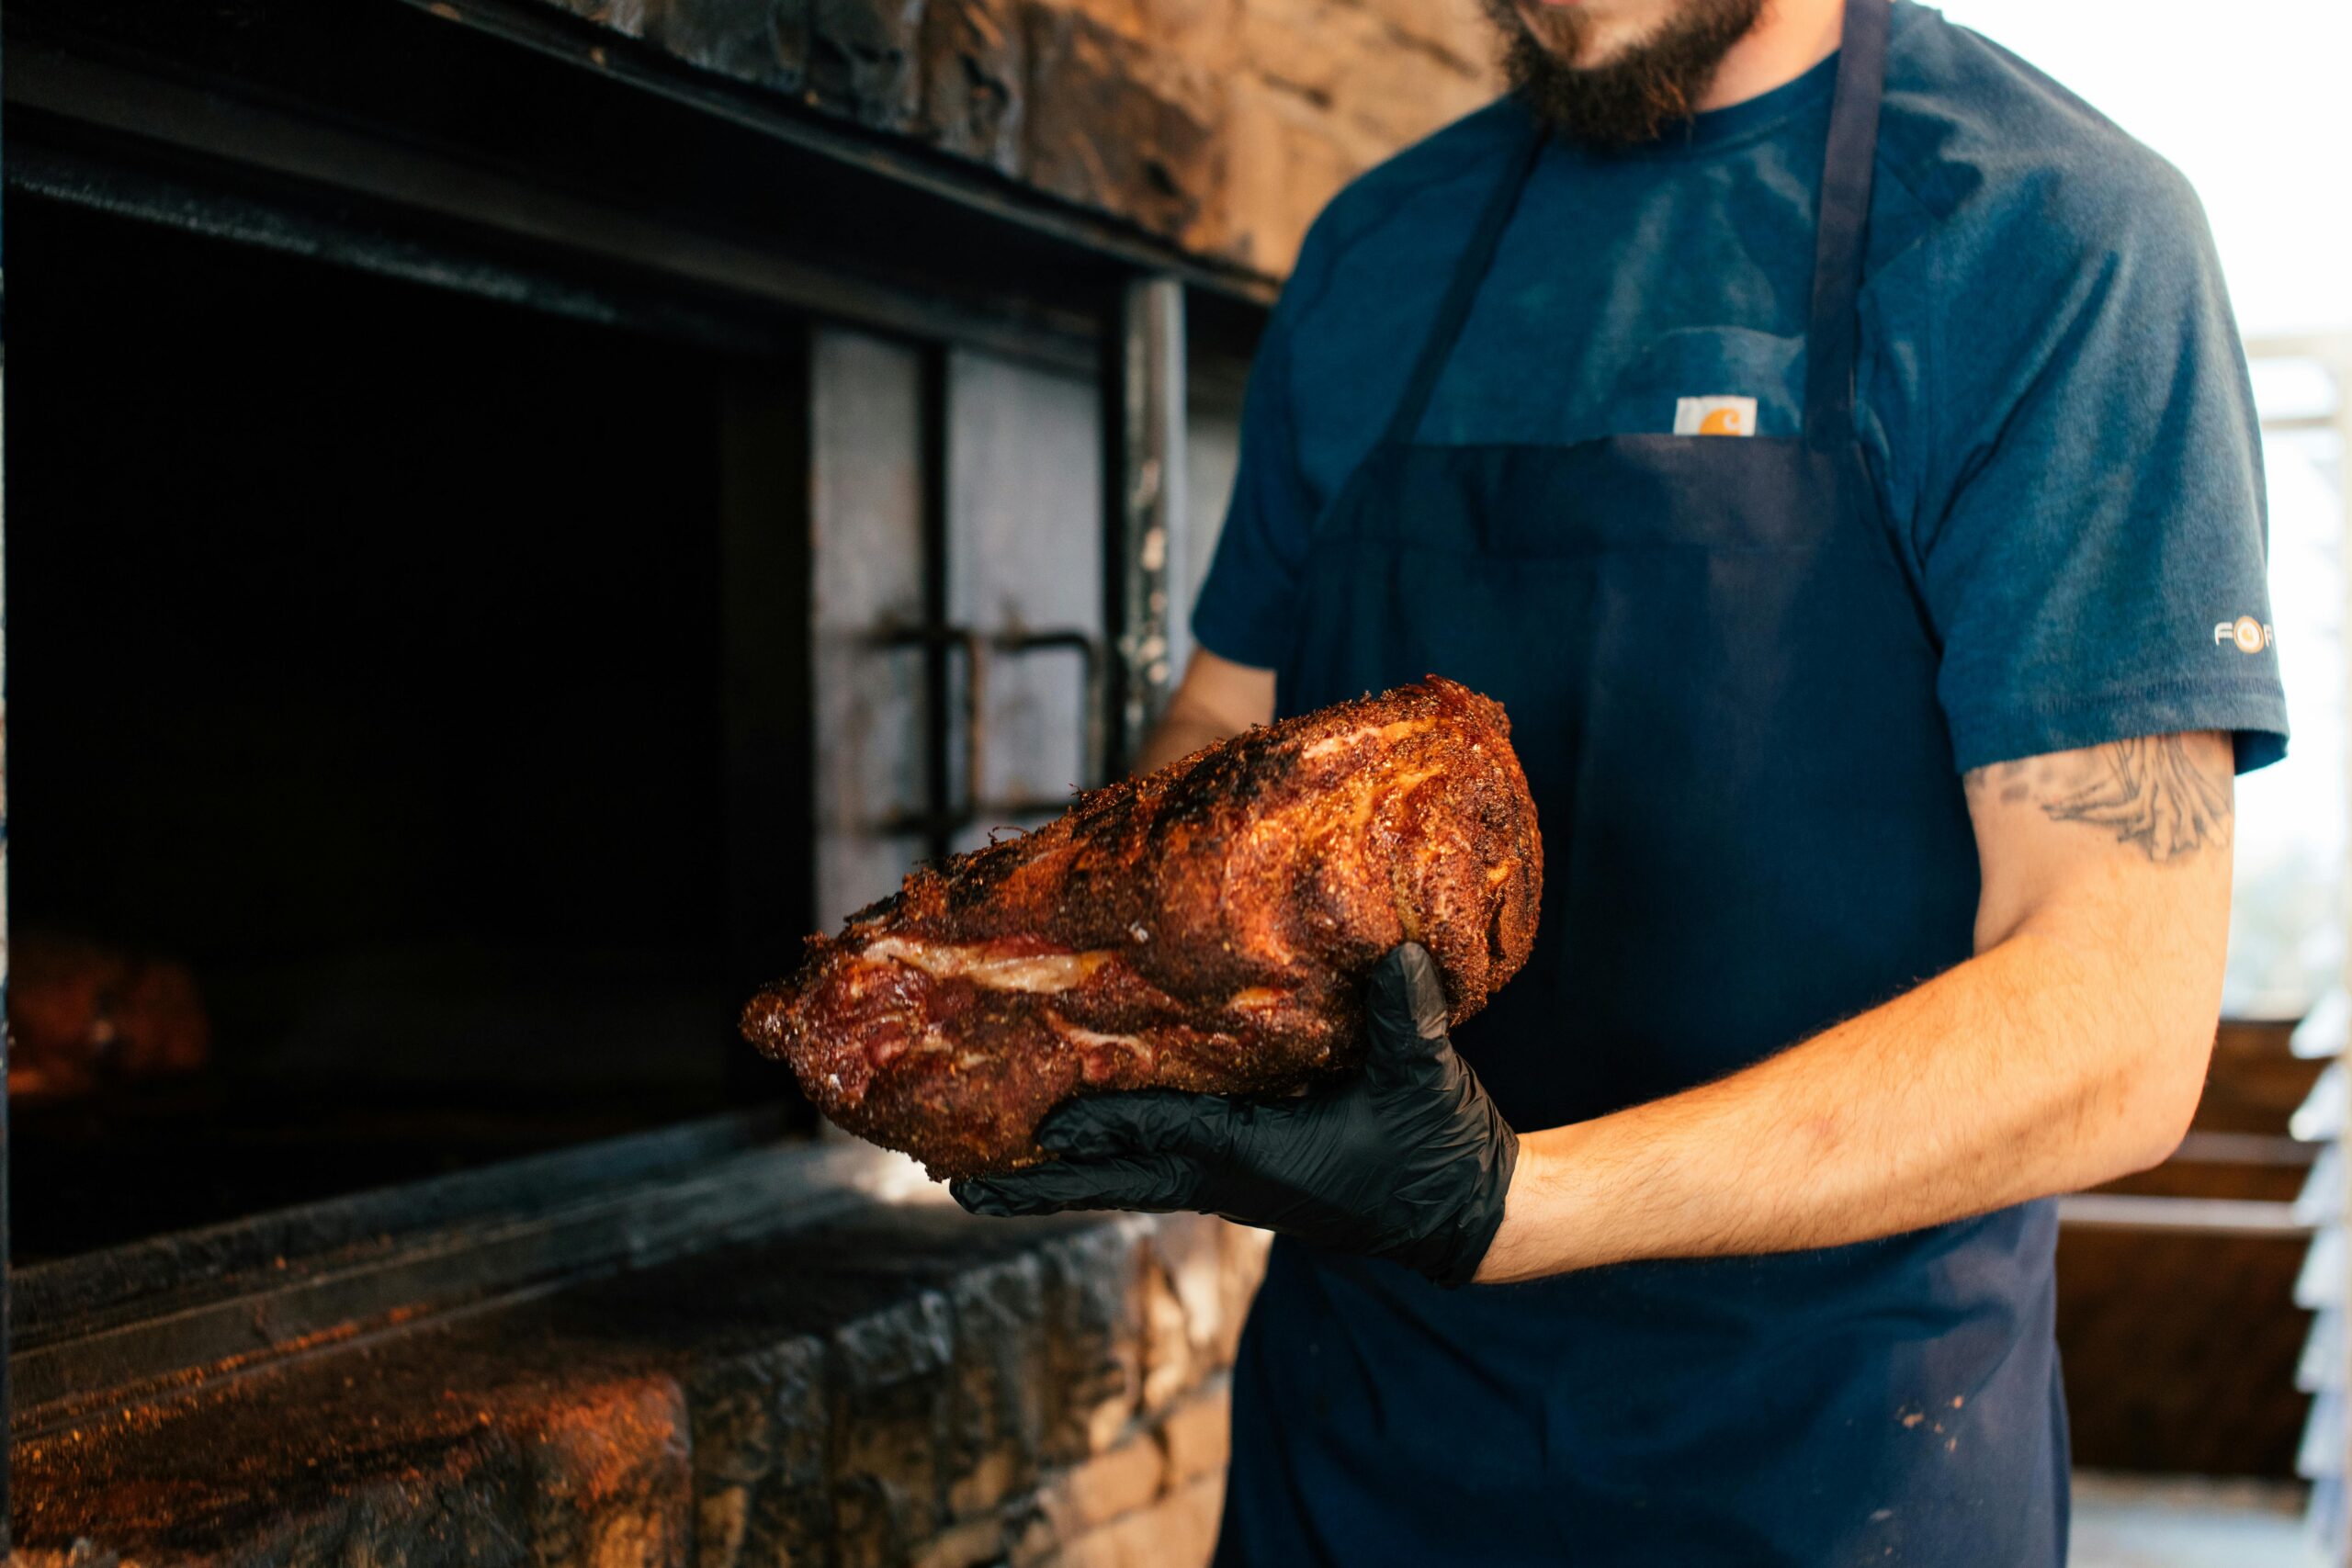
- Large fish or pork shoulders: 5-6 hours
- Tough cuts like beef brisket: 6-8 hours
- Whole pig or large game: 8-12 hours
Resist the temptation to uncover your pit prematurely. Each opening releases precious heat and extends cooking time. Trust the process—our ancestors perfected these timing estimates through countless generations of experience.
The Ceremonial Unveiling and Serving
When cooking time completes, the pit opening becomes an event worthy of celebration. Carefully remove the earth covering using flat stones or bark scoops, working from edges inward. Steam and aromatic smoke billow forth—a sensory preview of the feast awaiting discovery.
Use long sticks to lift leaf layers, revealing your perfectly cooked creations. Meat falls from bones with gentle persuasion, vegetables achieve creamy tenderness, and everything carries that distinctive smoky-earthy essence impossible to replicate in conventional ovens.
Serving Without Modern Utensils 🍽️
Continue the primitive experience through serving methods. Use large flat leaves as plates, carved wooden implements as utensils, or embrace hands-on eating as countless cultures have throughout history. Present food on flat stones or wooden planks for rustic yet elegant service.
The communal aspect of pit cooking naturally encourages sharing and gathering. Unlike solitary modern cooking, this method brings people together throughout the preparation, waiting, and feasting phases—recreating the social bonds that historically formed around food preparation.
Common Challenges and Primitive Solutions
Even experienced practitioners encounter occasional difficulties with clay pit cooking. Understanding common problems and their solutions ensures success on your primitive culinary journey.
Undercooked food typically results from insufficient stone heating or premature uncovering. Solution: Extend initial fire-building time and commit to full recommended cooking duration. If food emerges undercooked, rebuild a smaller fire and cook for additional time.
Addressing Excessive Smoke or Bitter Flavors
Overpowering smoke flavor indicates inadequate food wrapping or use of resinous woods. Solution: Increase leaf layers around food and stick to hardwoods exclusively. Some smoke is desirable, but food should taste enhanced, not overwhelmed.
Dry, tough results suggest insufficient moisture in the pit. Solution: Soak leaf layers more thoroughly and add water-soaked bundles of grass between food layers. The cooking environment should be steamy, not dry.
🌿 Seasonal Variations and Regional Adaptations
Clay pit cooking adapts beautifully to different climates, seasons, and available resources. Winter cooking in frozen ground requires advance planning—build fires to thaw earth before digging, or identify sandy areas that remain workable. Snow can actually insulate pit mounds, maintaining heat effectively.
Summer abundance offers diverse wrapping materials and ingredients. Corn husks, squash blossoms, and fresh herb varieties create seasonal flavor profiles. Tropical environments provide banana leaves, ti leaves, and coconut husks—each contributing unique characteristics.
Desert regions present challenges regarding combustible materials and digging in hard-packed soil. Solution: Use dry desert scrub for fuel, dig pits near seasonal wash areas where soil is softer, and embrace the intense, concentrated flavors that result from minimal moisture cooking.
Nutritional and Health Considerations
Clay pit cooking offers surprising nutritional advantages over many modern methods. The slow, low-temperature cooking preserves more vitamins and minerals compared to high-heat grilling or frying. The sealed environment retains water-soluble nutrients that would otherwise leach away.
The smoking process creates antimicrobial compounds that naturally preserve food while adding antioxidants. However, moderation matters—excessive smoke consumption over time poses health concerns. Balance pit-cooked meals with other cooking methods as part of a varied diet.
Environmental and Ethical Perspectives
When practiced responsibly, clay pit cooking demonstrates environmental sustainability. Using fallen deadwood rather than cutting live trees, minimizing ground disturbance, and fully extinguishing fires protects natural areas. The zero-waste nature of this technique—using completely biodegradable materials—aligns with ecological values.
Consider the ethical dimensions of primitive cooking in modern contexts. This isn’t about romanticizing hardship but rather appreciating skills that sustained humanity through millennia. It’s about understanding food origins, honoring ancestral knowledge, and recognizing that convenience isn’t everything.
Taking Your Skills to the Next Level
Once you’ve mastered basic clay pit cooking, numerous avenues exist for advancement. Experiment with fermented or aged ingredients for deeper flavors. Try multi-day cooking sessions for traditional preparations like Hawaiian kalua pork. Explore different regional techniques—the New Zealand hangi, the Mexican barbacoa, or the Polynesian umu each offer unique approaches.
Document your experiences through journaling or photography (once cooking concludes, of course). Note stone quantities, fire duration, cooking times, and results. This personal database becomes invaluable for refining your technique and teaching others.
🔥 The Deeper Satisfaction of Primitive Cooking
Beyond the exceptional flavors and tender textures, clay pit cooking provides something increasingly rare in modern life—the satisfaction of creating something substantial using only natural materials and personal skill. Each successful pit meal represents triumph over convenience culture, a tangible connection to human heritage, and proof that technology, while useful, isn’t essential for creating extraordinary food.
The hours spent digging, gathering stones, building fires, and waiting teach patience and planning. The physical exertion required builds appreciation for easy modern conveniences while demonstrating our capability beyond them. The communal nature of the process strengthens social bonds through shared effort and anticipation.
As you master this ancient art, you’ll discover that primitive perfection isn’t about rejecting progress but rather maintaining connection to foundational skills that defined human survival and culture. You’ll taste history in every smoky bite and feel ancestral satisfaction in every successfully excavated feast.
So gather your friends, identify a suitable location, and embrace the challenge of creating an unforgettable meal using nothing but earth, fire, and human ingenuity. The journey from raw ingredients to perfectly cooked feast, accomplished entirely through primitive means, offers rewards that extend far beyond the dining experience itself.